10 Different types of 3D Model process
The distinction between what is real and what is imagined is frequently quite slight. This is frequently the case with 3D models as well, because scenes may now come to life and be recreated in incredibly lifelike ways. The fundamentals of 3D production are the same whether you’re making an animation, a model for a website, or something for video games.
One of the most widely used CG services in the 3D Product, Interior, and Architectural design, as well as in the gaming and automotive industries, is the 3D model. The market for 3D visualization is flooded with offerings from CG companies and independent contractors. However, every contractor lists a different price. Marketers and manufacturers must first comprehend the process of 3D model production in order to fully comprehend the problem and choose the best course of action.
In this article, we will show you the different steps in order to create a 3D model.
1. Ideation:
The most crucial component of starting anything is an idea. You will stutter in the middle of any process if you don’t have a concept. If you’re learning 3D modeling for the first time using any software or by watching lessons on YouTube channels, you should plan your approach. Before you begin learning, make a plan for your first project.
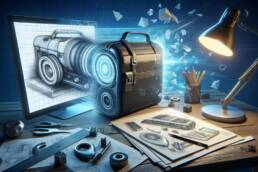
Obtaining reference 2D images is necessary if you want to create models. For instance, if you wish to build a 3D model of an airplane, you should be familiar with the design of the aircraft. An image of an airplane is the only way to understand its structure. After getting an idea, you can then start creating the models using any specialized software.
2. Setting the task:
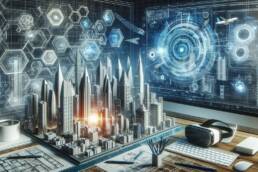
Marketers and producers must first be very clear about the goals they have for the 3D model. Whether a 3D item is used for motion solutions like animation, 360-degree product views, virtual reality (VR), or for static, stunning representations, depends on its nature and complexity.
Thus, a client gives a CG studio a specific mission by providing them with a thorough brief that includes examples, references, and 3D product designs. After that, they can go over all the specifics with the studio project manager and set a timeframe.
3. 3D Modeling:
This is the stage where a 3D model of any object is really created. To make a perfect 3D model as a novice, you must study a lot of things. However, as this is simply a beginning point and perfection will only come with a lot of experience, you are not required to produce a flawless 3D model. Therefore, put less emphasis on perfection and more on mastering the fundamentals of 3D modeling.
To create a 3D model, the first and most important thing that you will need is 3D modeling software. There are lots of software available on the internet such as SelfCAD, Blender, Onshape, TinkerCAD, 3D Slash, Fusion 360, and FreeCAD.
4. Detailing:
The artist now adds details to the basic 3D model pieces. The appearance is smoother and more detailed; they resemble their ultimate form. In order to set up the environment for texturing, some artists also install the lighting and the cameras at this stage.
5. Adjusting Polygons and Topology:
Basic geometry is frequently followed by the need to modify the polygons to fit the contours of the object. It is essential for the kinds of objects that would be too heavy to run in apps, VR, AR, or computer games created with the Unity engine. In these situations, fewer polygons are needed to solve the issue, thanks to techniques like topology and retopology. Lesser polygons that faithfully replicate the shape and structure lines result in a 3D model that is lighter while still maintaining high quality.
Reduced system problems and other types of errors are also made possible by topology and retopology for the 3D model. When used, 3D objects don’t need much processing power from a computer or a smartphone, but they communicate images with excellent clarity and realism.
6. Texturing and Material:
For 3D software, there is a tonne of different material libraries where you can find a variety of textures and materials, like stone, wood, metals, and fabrics. By incorporating colors, patterns, and textures, texturing enables the artist to give the 3D model a more lifelike appearance. In other words, it symbolizes the skill of dressing 3D models. You must comprehend UV mapping at this stage, as well as how textures are used in various applications.
When a client requests it, 3D artists can always design their own textures in addition to the ones they typically use. This choice is ideal for using premium materials to create personalized items with distinctive designs. No other 3D artist will be able to utilize the custom texture to create a 3D model. Naturally, designing your own texture costs money and takes time, but in this way, a skilled 3D expert may provide the precise material that a manufacturer requires.
7. Mapping:
Making a texture map and placing it over a 3D model is the process of mapping. While maps are always created in 2D, 3D objects are 3D volumes. It implies that they are nothing more than a colored flat picture with no relief on the surface. Consequently, even with various maps at their disposal, 3D artists must exert effort to make the material look genuine.
8. Lighting:
One of the most crucial steps in a 3D model is lighting. Without employing the lighting tool, a great 3D model is still possible. You should become adept at lighting theory in addition to. Most beginners who learn 3D model alone make this error. They don’t concentrate on the other elements of the 3D model, like lighting, they only learn the method itself. In a model, lighting refers to the process of simulating light in an artificial setting. The final output may not always appear great after you have done a 3D model of your model because some lighting must be applied before 3D rendering.
9. 3D Rendering:
Basically, rendering is the process of transforming 3D models into highly detailed 2D images on a computer and fine-tuning the data in them.
A similar creative technique to photography is 3D rendering. Unlike photography, which uses a camera to collect images, 3D rendering makes use of 3D CAD software to build 3D models, which are then rendered.
We move closer to the outcome as the scene starts to become more accurate and detailed. After finishing the lighting and texturing, the artist renders the scene. Typically, errors are discovered during this procedure, and the artist makes the necessary corrections to his work. Because defects are a natural part of the world, our team will spend a significant amount of time adding them to give it a more realistic appearance.
10. Post Processing:
The post-processing phase is the last step in every scene’s rendering. This is the point where the artist further adjusts the rendered image using post-processing tools to highlight even more details. The rendered scene is typically given a color makeover, and some artists will even add effects and picture filters to enhance the appeal of the scene. At this stage, lighting is also crucial to creating a realistic-looking. In fact, well-executed lighting has the potential to produce scenes that are more believable. Post-processing typically takes a long time and demands intense focus to produce the desired outcome.
The framing comes next after the scene is finished. The latter must be carefully considered because it will affect the mood we offer to our graphics. Our 3D modeling software allows us to zoom in on every element and adjust angles as needed to select the ideal point of view.
“If you have a project or need some assistance in the making of a 3D model, let us know so we can get you in touch with them. Choose our 3D modeling services and get accurate 3D objects of photorealistic quality!